Friday, May 26, 2017

Whimsical Garden Teapot

 I got the idea on Hometalk (click here to see their post) and I knew I just had to try it.  I think this is the year of the "whimsical garden decor" for me as I just completed my Napkin Decorated Fence, Plate Garden Border and I have a few other ideas in the planning stages!
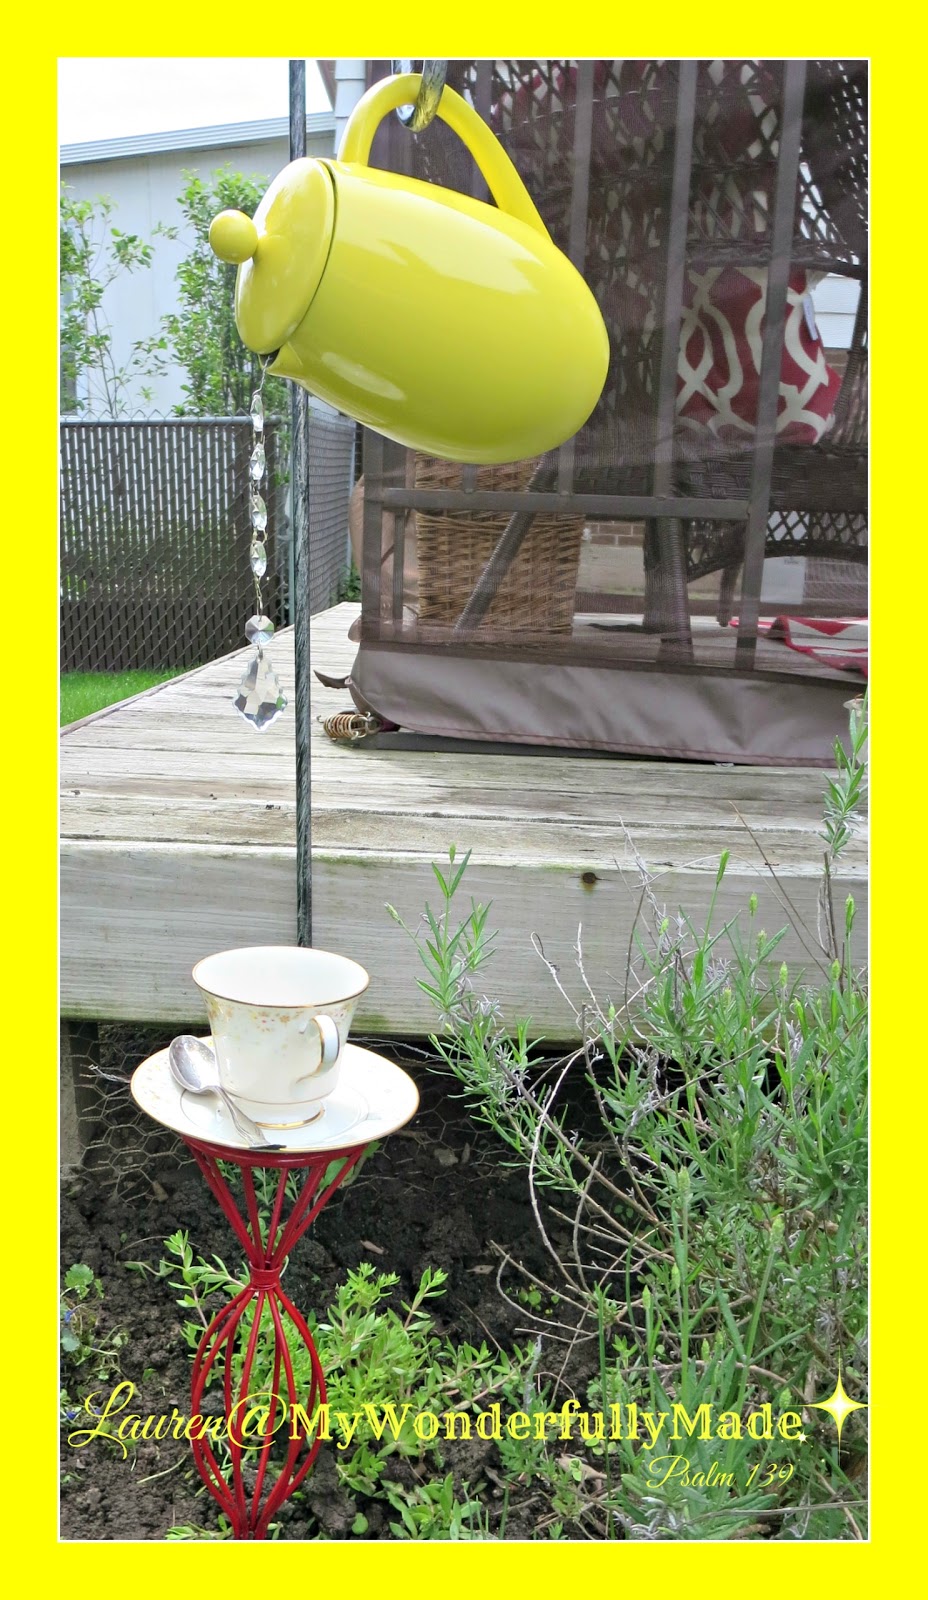
I love this bright yellow! It really stands out in the flower bed. For the prisms, I threaded them through a thin piece of wire and attached that to the inside of the teapot.
As I said, I turned the candle holder upside down for this project because the other end has that pointy 'stake' to hold a candle and I didn't want to bother trying to cut it off.  And the saucer literally fit the circle PERFECTLY like it was meant to be there.  E6000 glue was used to cement the cup and spoon to the saucer and then to attach the saucer to the holder.
All of the supplies (I already had the paint and the spoon) cost less than 6.00.  
Now hoping for some SUNSHINE and warmer temps so I can enjoy my yard and gardens!  Have a wonderful and safe Memorial Day Weekend!

On any given week (depending on how busy I am!) I love to participate in Link Parties.  These gals put a lot of time and effort into hosting these parties so I always want to show my appreciation by directing my readers to these blogs. 

Monday

Tuesday

Wednesday

Thursday

Friday


Monday, May 22, 2017

Napkin Decorated Garden Fence

A friend of my husband's gave him several of these fence pieces because he thought I might like them.  Well OF COURSE I liked them.  I've been using one piece 'as is' on my porch from time to time with seasonal signs hanging on it but I decided I wanted to use a piece in my garden.  
I love using napkins for lots of projects but this is the first time I've used them this way.  I bought some pretty ones at the party store.  Using a piece of tape, you simply tap the back, white layers of the napkins and separate them from the printed side.  Just toss the white and keep the printed piece.  I applied a really thick layer of Mod Podge to the boards and then laid the napkin piece on.  I gently applied another really thick layer of Mod Podge and then let dry.  It doesn't matter if some of it tears -- you'll be sanding and distressing anyway.
Here you can see the difference between the unsanded and the sanded boards.  I used my electric sander but you could use a sanding block or sand paper if you want.
I wanted to make a sign to hang from the fence and I love this saying.  It definitely suits my garden!  I just printed the words on copy paper and then used graphite paper to trace the letters.  Using a very fine point artist brush, I painted the words with acrylic paint, than sanded lightly.
I also did a white wash on the rest of the wood that was not decorated.  I like how that part kind of blends into the siding. I also did two very thick coats of matte polyurethane to seal this.  I guess if you use a different type of Mod Podge you wouldn't need to do that.  I also sealed the garden sign as that was also done with acrylic paint which would not withstand the elements.
This garden got a new border this year.  I'm just collecting plates from the thrift stores and garage sales and burying them halfway.  Once the grass fills in, it will look a lot neater.  I opted to do small and large plates but you could do all small, all large, all the same color -- whatever you want.  They are holding up well and I've used my electric trimmer against them with no issues.
This would be a great project using a pallet as well or any scrap wood for that matter.  Summer is my FAVORITE season and I love creating new little 'surprises' for the garden!

On any given week (depending on how busy I am!) I love to participate in Link Parties.  These gals put a lot of time and effort into hosting these parties so I always want to show my appreciation by directing my readers to these blogs. 

Monday

Tuesday

Wednesday

Thursday

Friday
Chic on A Shoestring 

Monday, May 15, 2017

Make Ahead Mini Frittatas

For my Sunday school team meetings I like to do something a little extra, special and serve breakfast.  This time I decided I would try these mini frittatas -- the original recipe is found at The Incredible Edible Egg site.  I love that these can be made ahead of time and then just microwaved to reheat before serving.  I followed their recipe with just a few changes in ingredients.
 Instead of the zucchini and peppers, I added broccoli, onion and mushrooms.  Whatever veggies you are adding, you will want to chop them into tiny pieces so they are distributed throughout the mini frittatas.  I also always saute my veggies first -- it brings out more flavor!
 I always have fresh spinach and/or kale so I opted to add some chopped spinach which I also sauteed just until it started to wilt.
 Now these definitely would have been great without meat but since I had a package of bacon bits, I added those. I really love these bags of bacon for recipes like this -- so much easier than frying bacon.  I think browned sausage would be good in these too!
 I doubled the recipe and it made exactly 24 frittatas.  I baked mine for 20 minutes because knowing I would reheat them, I wanted them slightly underbaked.
 Don't they look yummy? Well, let me tell you -- they were! I think these would freeze very well also.  I plan on make a few batches and keeping them in the freezer.  Who wouldn't like being able to pop a few of these in the microwave in the morning??

On any given week (depending on how busy I am!) I love to participate in Link Parties.  These gals put a lot of time and effort into hosting these parties so I always want to show my appreciation by directing my readers to these blogs. 


Monday

Tuesday

Wednesday

Thursday

Friday
Chic on A Shoestring